Reach Garden & Grace’s 100,000+ Followers through the PRO Directory. Apply here.

Search
Close this search box.

How I Transformed a Dated 1965 Bathroom into a Fresh, Boy’s Bathroom

You won’t believe the before! Here are all the details of how I transformed my boy’s jack and jill bathroom into a fresh, timeless space for them to grow into. Renovation details include paint colors, plumbing fixtures and wallpaper selections.

When we bought our home at the end of 2022, we knew it would require some updating but that’s part of the reason we loved it so much. We were moving from a newer home that had already been updated but it didn’t feel 100% like us. So, we were excited to renovate this original 1965 bathroom and get exactly what we wanted: a fresh, traditional bathroom that would grow with our family and add personality to our house. 

Before we get to the selections we made and the details of the bathroom, I think it’s important to show you the before bathroom so you can appreciate where it started and how we got to where it is now.

We took it down to the studs

After discovering a leak from the bathroom into the kitchen, we learned the bathroom tile was not properly sealed and water had been slowly going through into the floorboards. Over time, the beams had absorbed too much water and eventually, the water just went straight through into our kitchen. Fun, I know 🙂

We took the bathroom down to the studs and had to replace two beams in the kitchen. Thankfully, during the process we learned we have a very sturdy home thanks to the original owners building it right. We also have copper piping and all the good things that come with buying an older home. With all of the structural issues taken care of, we were able to focus on putting the bathroom back together.

We expanded the footprint into the closets behind it

The footprint of the bathroom was small and made everything feel tight. Since we had two boys sharing the bathroom, I knew we needed to create more space and find ways to optimize the space we had. I changed the two original doors out for pocket doors. To ensure the bathroom doors didn’t look new and out of place, I opted to have the original doors cut to fit as pocket doors. It’s a bit of a process to add a pocket door and would work best if you’re already going down to the studs since you’ll need to get into the drywall to add the pocket door frame. This made a huge difference though and made the current square footage more functional.

We added a ventilation fan since there wasn’t one that worked and added a sconce by the vanity. That created the need for 3 outlet switches and there wasn’t currently a place large enough to put one. The wall across from the vanity wasn’t an option since the pocket door frame was there. Our electrician recommended pushing the tub back to create space for the switch plate and to make the bathroom larger. Fortunately, both boy’s closets are behind the tub so we were pretty easily able to push the tub back 5 inches which felt like 12 inches and made a big difference. 

The original cast-iron tub was in a good shape so we kept it and replaced all of the plumbing fixtures and shower tile. I did a bevelled subway tile and chrome tub faucet, shower head and knob

I love the clean, classic look it gave us. 

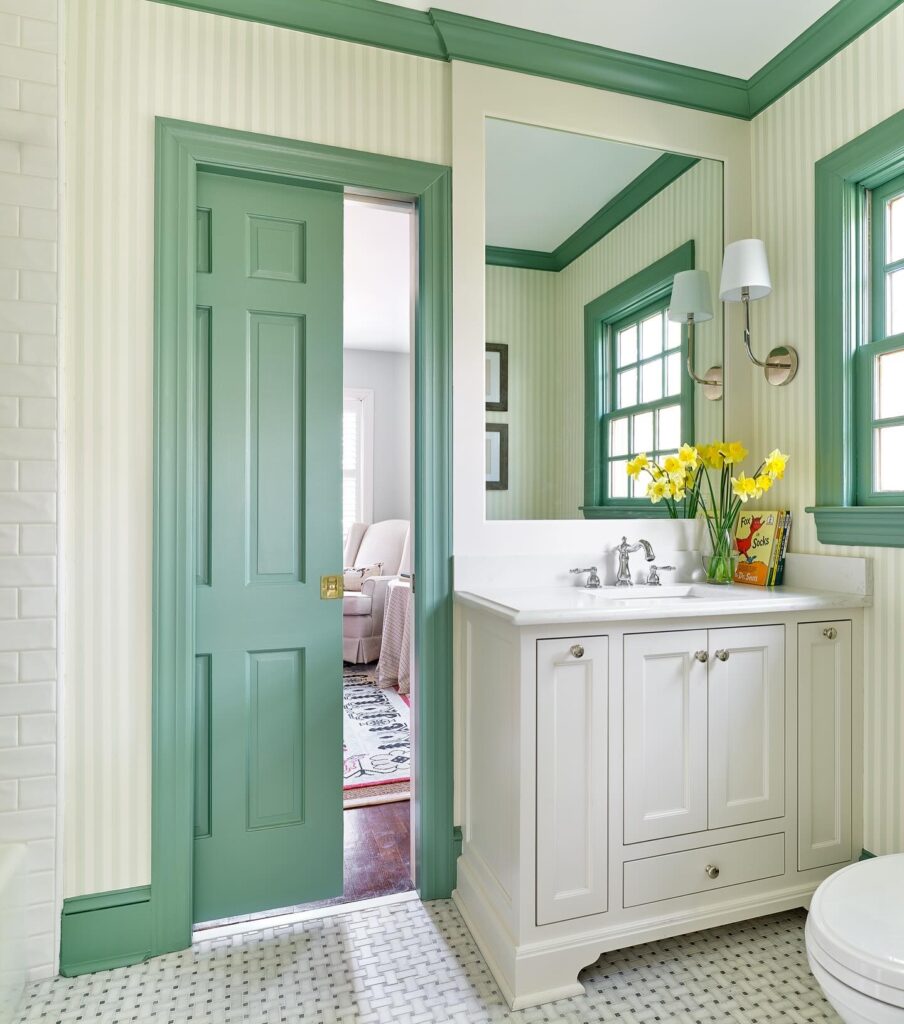
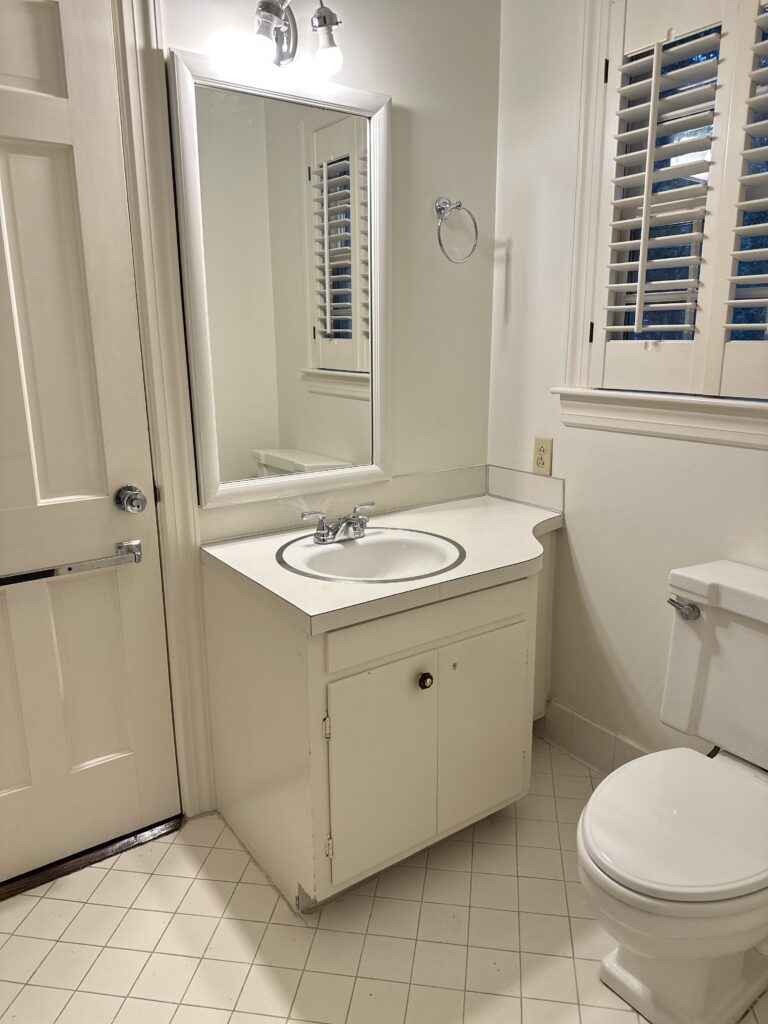
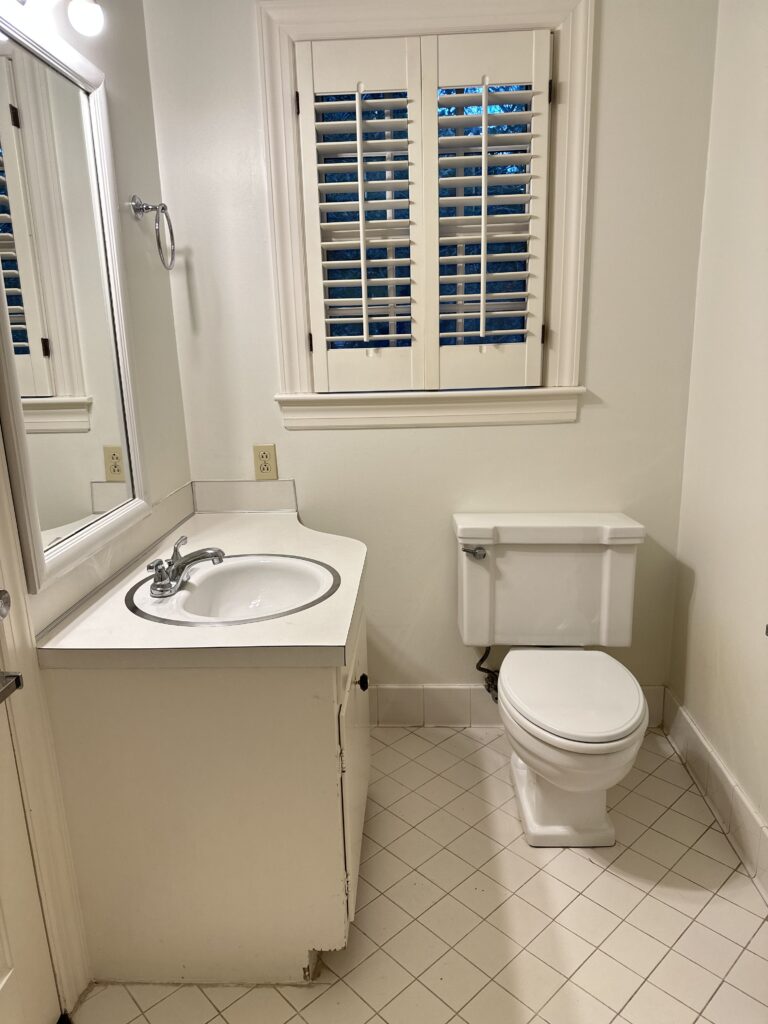
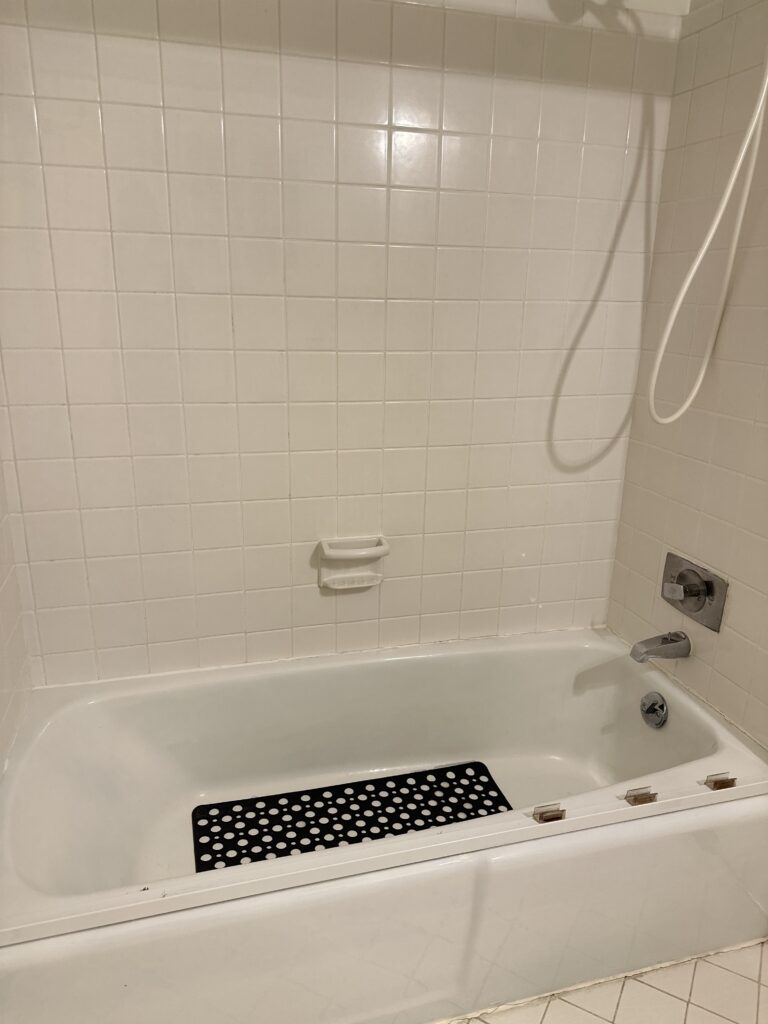
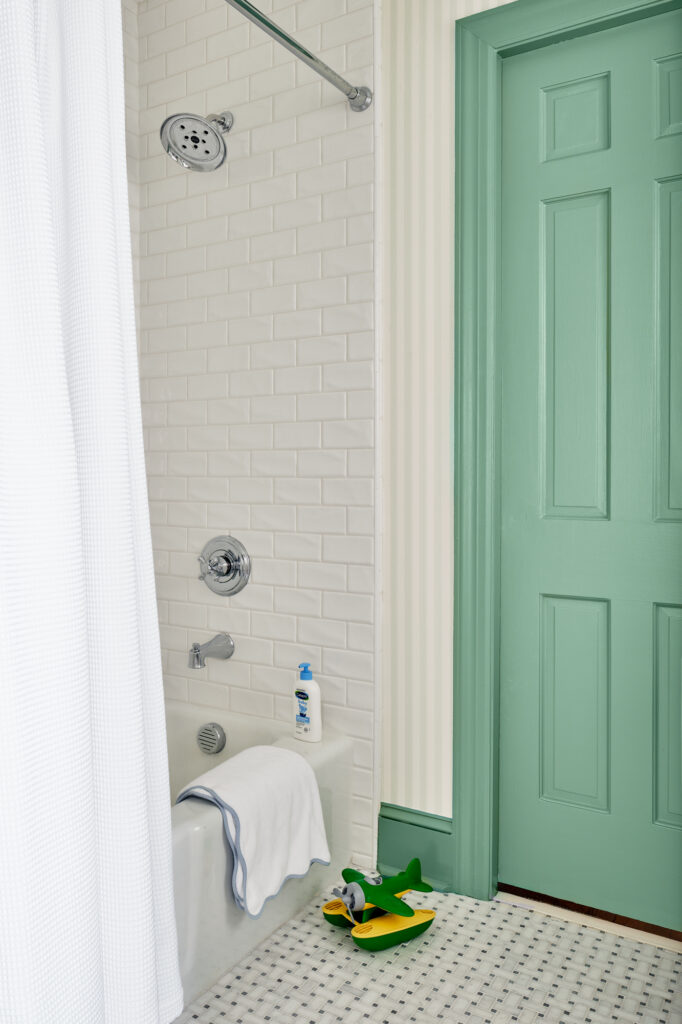
For the floor tile, I went back and forth. I knew I wanted something that would make the bathroom feel timeless but couldn’t do anything too large scale since the bathroom footprint was small. I ended up with a basketweave marble that I absolutely love. It has variations of marbling and a center square that’s a light gray / green. I did a white grout color called “frost” to give it a seamless look. I know white grout can be scary, especially with kids, but there are a lot of ways to get stains out now, including the age old cleaning solution: 4 tablespoons of baking soda, white vinegar, and ammonia with 1 ½ quarts of warm water.

The vanity might be my favorite update. The old vanity was low, which was customary for 1960’s, but felt awkward and didn’t provide much storage. I also have a thing about things being symmetrical and the original sink, mirror and light were positioned off-center to the left. Because the distance between the vanity and the toilet is tight, I wanted to design a custom vanity that was narrow and gave us storage. Because we added a pocket door, we had to move the plumbing for the sink over to the wall with the window. In doing so, it gave us the ability to create storage on the left and right of the vanity. On the left, it looks like a pull drawer but inside are shelves. On the right, there’s actually a built-in trash can. It allowed us to preserve floor space and keeps the bathroom clear of unnecessary clutter. The vanity is painted in Benjamin Moore White Dove.

As mentioned above, we also added a ventilation fan. We removed the existing vanity light and re-wired the bathroom so we could do a sconce on the side wall. That allowed us to put a large, framed mirror above the vanity. To add additional lighting, we added a recess light centered above the cast-iron tub and one in between the vanity and toilet. 

Now for the really fun part! I wanted the bathroom to feel like a little boy’s bathroom and am always drawn to stripes. I fell in love with this Farrow & Ball Closet Stripe wallpaper as soon as I saw it. The other plus is that it doesn’t have a minimum yardage order which was important since the bathroom didn’t require many rolls.

I share all of this as I know so many of you are going down the renovation journey. Whether renovating or building, I hope you found this blog post helpful. I liked everything I could below – my main sources were Ferguson, Farrow & Ball and Capitol Lighting. I can’t wait to see what you do!  xx, CMM

Our bathroom sources

Shower Head (Chrome)
Shower Cross Handle (Chrome)
Widespread Faucet - Chrome
Tub Faucet (Chrome)
Cabinet Color
Toilet Bowl
Toilet Tank
Wall Sconce
F&B Wallpaper
Bath Mat
Shower Curtain
Bath Mat

How I Transformed a Dated 1965 Bathroom into a Fresh, Boy’s Bathroom

Related Posts